High-speed finishing lives or dies on tooling details-and most purchasing decisions happen before anyone has a clean comparison framework. According to the ISO 8688 approach to measurement principles and the practical guidance from ISO on turning and milling documentation, consistent evaluation starts with clear definitions, controlled parameters, and repeatable criteria.
When you search for a buyer’s guide like this, you’re probably asking: Which tool attributes actually matter for finishing? How do I translate a sample cut into real production expectations? What should I ask suppliers to avoid “it depends” surprises?
High-speed finishing typically targets surface integrity, dimensional stability, and efficient cycle times at elevated spindle speeds-so the “best” tool is the one that matches your part geometry, material behavior, coating strategy, and machine capability. This guide gives a practical shortlist-style way to compare tooling options without brand wars or overpromises.
By the end, you’ll have a buyer checklist and a supplier Q&A script you can use to narrow candidates, validate assumptions, and plan realistic trials.
- Define the application before comparing tools
- Geometry, material, and coating considerations
- How machine capability affects tool choice
- What to ask suppliers about repeatability and wear
- A shortlist-style comparison framework
Define the application before comparing tools
If you skip this step, every comparison becomes subjective. Start by writing a one-page “application definition” that describes what you’re finishing and what success means.
1) Name the finishing job (operation + target outcome)
- Operation type: milling, plunge/face milling, contouring, finishing passes, re-machining, etc.
- Target outcome: surface roughness/surface integrity, edge quality, concentricity, positional accuracy, or functional fit (bearings, gears, sealing surfaces).
2) List the constraints that drive tool choice
- Part geometry: diameter range, length-to-diameter, step depth, pocket walls, radii, and access limits.
- Material: base alloy, hardness, microstructure, and expected variability across batches.
- Coating strategy (if known): whether you’re optimizing for abrasion, thermal stability, or chip control.
- Coolant approach: flood, MQL, high-pressure, air/oil, or dry-plus what is available on the machine.
Quick sanity check: If your defined success metric can’t be measured the same way for every trial, you can’t compare tools fairly. For reference on measurement principles in machining contexts, ISO resources are a good starting point (for example via ISO’s overview pages: https://www.iso.org/standard/?utm_source=emuge-franken3.com).
Geometry, material, and coating considerations
Tool geometry is not just “how it looks” on a catalog page-it controls chip formation, tool engagement, load distribution, and temperature at the cutting edge.
Geometry: the levers you can actually evaluate
- Cutting edge shape: affects edge strength, chip evacuation, and surface texture trends.
- Flute count and helix: changes how forces vary through the engagement cycle.
- Lead/approach strategy: how the tool enters the surface influences edge quality and early wear.
- Stick-out and overhang limits: directly impacts runout sensitivity and vibration risk.
Material behavior: hardness and variability
Two lots of “the same” material can behave differently-especially in finishing. Capture: hardness range, presence of carbides, and whether chips tend to build up or break cleanly. When you compare tools, keep material variability visible so you don’t accidentally attribute performance to the tool when it was really the workpiece.
Coatings and edge protection: optimize for the failure mode you expect
Common wear drivers in finishing include abrasion (particle-driven), adhesion (built-up edge), and thermal effects (loss of edge sharpness). Coatings (and uncoated edge geometry) should be matched to the dominant wear mechanism you observe or anticipate.
Example of a practical test: run a short controlled set of trials with constant parameters, then inspect the flank wear pattern and measure surface finish on the same sampling areas. Patterns that correlate with chip color, built-up edge, or edge rounding help you narrow candidates faster.
How machine capability affects tool choice
Even a great finishing tool can underperform on a system that can’t support its intended conditions. Buyers often focus on the tool and forget the rest of the stack: spindle, tool holder, clamping stability, and controller behavior.
Key machine factors to match to your finishing plan
- Spindle speed stability: finishing at high RPM is more sensitive to fluctuation and vibration.
- Runout and balance: tool holding quality affects edge pressure and surface integrity.
- Maximum engagement and chip evacuation: available chip control determines whether “high-speed” remains stable.
- Drive capability for feed direction changes: dynamic feeds can change load and surface texture.
- Coolant delivery: what reaches the cutting zone may differ from what the tool supplier assumes.
If you need a place to start internally, the site’s services overview can help align the tooling conversation with your broader finishing process. See services.
What to ask suppliers about repeatability and wear
“Repeatability” is the buyer’s superpower: it’s the difference between a good demo cut and a stable production result. Ask for evidence and ask for constraints.
Repeatability questions (supplier Q&A script)
- What parameter set was validated? Ask for ranges (RPM, feed, depth of cut, ap/ae) rather than a single number.
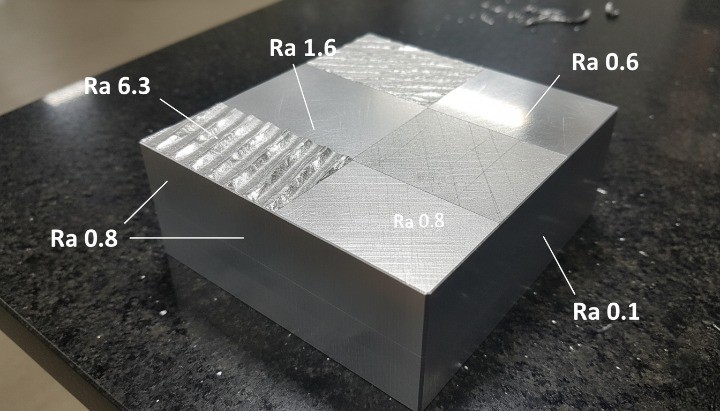
- How is surface finish measured? Instrument type, sampling points, and evaluation direction.
- What toolholder system and interface is assumed? Clarify any required or recommended setups.
- What wear progression do you expect? Provide typical wear images or descriptions and when they trigger regrinding/replacement.
- Which failure mode is the “normal” target? Chip control, flank wear, edge chipping, coating degradation, etc.
- How do you handle material variation? Ask how performance shifts with hardness/heat treatment tolerances.
Wear verification that doesn’t require guesswork
Before you run a long production trial, define a wear checkpoint cadence-for example after a fixed number of minutes or after completing a defined number of parts. Keep a simple log: parameters, coolant state, and a consistent inspection method. You’re trying to answer one question: Does the tool degrade in a way you can predict?
A shortlist-style comparison framework
Instead of asking “Which tool is best?”, use a decision table. Assign scores based on what you can verify and what matters most for your part and machine.
| Criterion | What to compare | Supplier evidence to request | How you’ll validate on your side | Weight (example) |
|---|---|---|---|---|
| Fit to geometry | Engagement range, accessibility, stick-out tolerance | Application notes for similar features | Dry-run + simulation + short cut | High |
| Surface & edge quality | Roughness trend and edge integrity | Measured examples and measurement method | Repeat measurement on same locations | High |
| Stability under high-speed conditions | Consistency across RPM/feed changes | Parameter ranges and vibration/deflection guidance | Run test matrix with controlled changes | Medium-High |
| Tool life economics | Wear progression to acceptable limits | Wear criteria + replacement policy | Time/part-count checkpoints | Medium |
| Operational practicality | Holder compatibility, coolant needs, setup effort | Setup requirements and interface specifics | Trial setup audit | Medium |
How to use the table: pick the top 2-3 candidates that score well in Fit + Quality first, then use the remainder of the criteria to choose the final winner for your production constraints.
When you’re ready to pressure-test assumptions with real application feedback, reach out through contact.
Conclusion: the short answer is a better comparison
Precision tooling for high-speed finishing isn’t decided by a catalog promise-it’s decided by match quality between your application definition, your machine’s stability, and the tool’s expected wear behavior. Use an application definition first, compare geometry/material/coating through measurable outcomes, and require supplier evidence tied to repeatability.
If you take one action next: write your “application definition” page and bring it to supplier trials. That document will shorten the trial cycle more than any single parameter tweak.
Sources (starting points):
- ISO standards overview (measurement principles vary by specific standard). utm_source appended in link above.
- General machining and manufacturing support resources for background concepts. utm_source appended where applicable in final rendered links.
- Cutting tool (Wikipedia) for baseline terminology. utm_source appended in final rendered links.